In a recent post I described a 1974 Raleigh 20 FE, in near original condition, that had been in the same ownership for 40 years. The husband of the FE’s owner also had a 20, which was a folding version, badged as a BSA 20, and made in 1978. I rescued both bikes from an almost certain final trip to the local tip. I sold the FE on eBay for less than its replacement lamp cost me. I didn’t mind though, as I needed the space and it saved the bike from a prematurely ignoble end. As for the BSA 20 folder, I decided to keep it and refurbish it.
My aim was not the ultimate ‘hot 20′, which could cost quite a lot of money. Instead I decided to upgrade the less desirable old components, mostly with items from eBay or the spares box, plus a few from St John Street Cycles or Amazon Market Place dealers. The following annotated photo sequence shows the end result, a very rideable hack which, because of its colour scheme, I call Cappuccino.
The 1974 Raleigh 20 FE, described in a previous post, weighed a hefty 37 lb (almost 17 kg) in orignal form but without its rear bag. (That, however, is a pound and half less than my grandson’s modern but relatively inexpensive mountain bike!) The BSA folder weighed 32 lb (about 14.5 kg) in its original form but after the modifications described below, it weighs 30 lb (about 13.6 kg) without bag, despite having the addition of a rear carrier. Further weight savings could be made by replacing the original wheels with new ones having alloy rims, alloy hubs and narrower tyres, and by replacing the handlebars and stem with alloy equivalents.

Above: A general view of Cappuccino, complete with the Carradice handlebar bag which, via Klickfix fixings, gets used on several of my bikes.

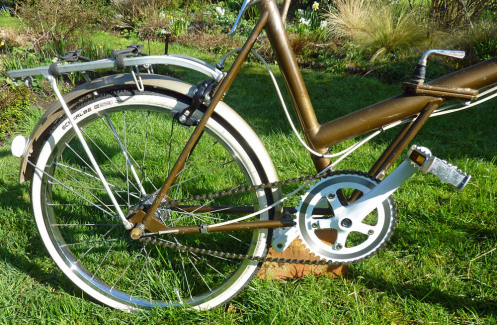
Another view of the bike, this time from the left side.
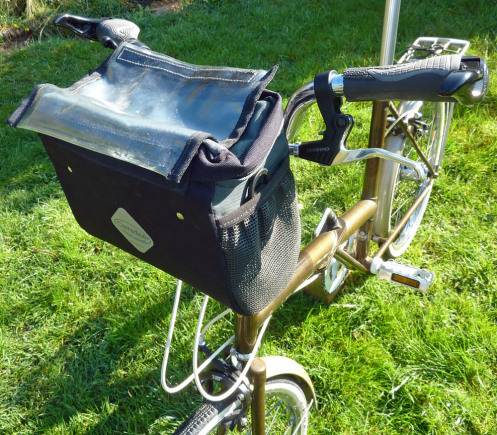
I decided to keep the original steel stem and handlebars, as they are in fine condition, are nicely rigid and allow lots of adjustment, both vertically and fore and aft. The Carradice bag (great for day rides) is easily detachable via a Klickfix bracket on the handlebars and has a handy shoulder strap. The ergonomic handlebar grips (cheap but adequate copies inspired by Ergon) make a big difference to comfort. The Tektro brake levers are also a huge improvement on the cheap steel originals, having far superior leverage, adjustable reach and cable adjustment.
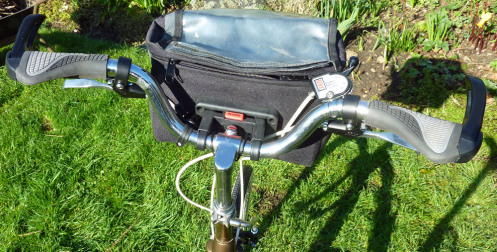
A rider’s-eye view of the handlebar cluster, showing the Klickfix bracket, the Sturmey-Archer 3-speed trigger and a bell, tucked away to the left of the bag bracket. This set-up enables the bike to be stood upside for maintenance, with stable three-point support via the handlebar grip forward extensions and saddle.

A view of the handlebar cluster with the bag removed, showing the front of the Klickfix mount.
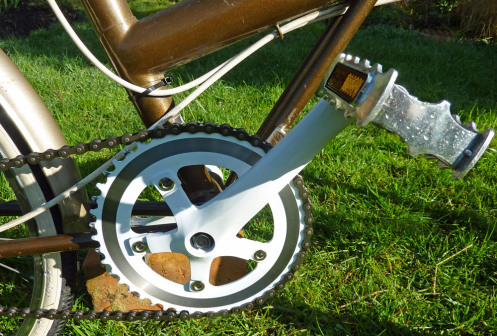
I decided to ditch the chainset and bottom bracket axle and bearings, and replace them with a cotterless assembly. The chainset was an inexpensive unused item from eBay but nonetheless has a proper detachable chainwheel. This enabled me to move the chainwheel to the left hand of the spider, which was very important to get a reasonable chain line. The chainwheel was sold as being for 1/8-inch chain but actually works fine with older style 3/32-inch chains (e.g. for 6-, 7- or 8-speed derailleurs). Also in shot is an MKS all-metal folding pedal, which replaced the very heavy solid bearing original pedals and enables the width of the bike to be usefully reduced very easily for transit or storage. I dispensed with the hockey stick chainguard and its mounting bracket, filing off the sharp corners of what was left of the fixing point on the strut behind the chainwheel.
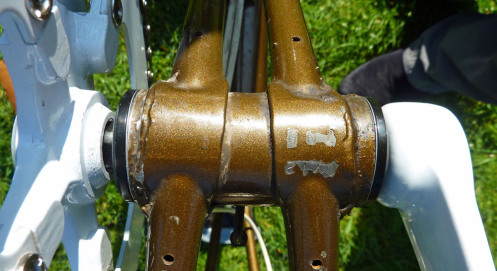
Raleigh 20s and their badge-engineered brethren have ultra-wide (78mm) bottom bracket shells and are Raleigh-threaded. This is very limiting when it comes to converting to a cotterless set-up, especially at a reasonable price. So I reduced the width of the bottom bracket shell, on the chainwheel side, by 5mm. This enabled me to fit a relatively inexpensive Oxford 73mm-wide threadless bottom bracket cartridge. The letters and numbers stamped onto the bottom bracket are not a serial number but the postcode of the previous owner.
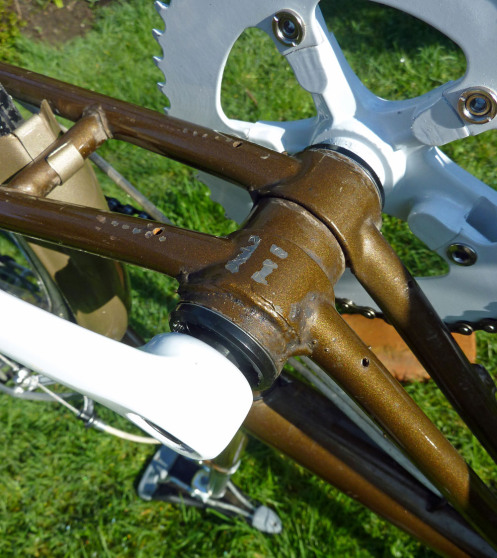
This shot clearly shows how the chain stays of the Raleigh 20 series were flattened and wrapped around the bottom bracket shell (to which they were brazed) before continuing forward to form bracing struts, brazed to the underside of the main beam.

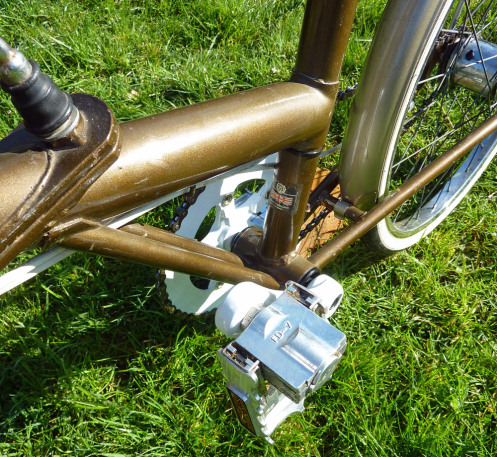
A wider view of the same area. Note the struts, which join the main beam below the frame hinge on the right of the picture.
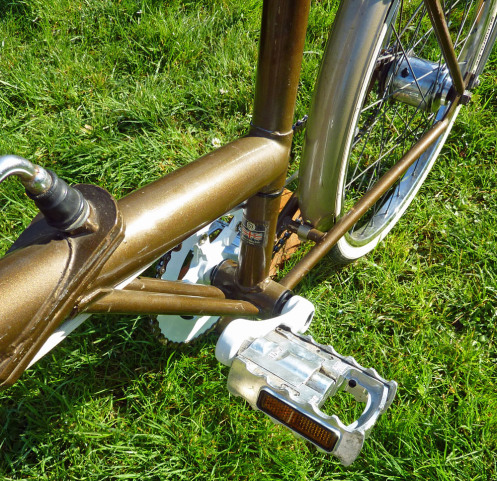
Another view of the MKS folding pedal and surrounding area. Note the frame hinge on the left and the TI ‘made in Britain’ sticker at the base of the sear tube.
A similar view but showing the pedal in folded mode. The difference may not seem much but a pair of such pedals can reduce the stored width of the bike by about 5 inches (12.5 cm).

Another view of the folded pedal, with the frame hinge at top left.
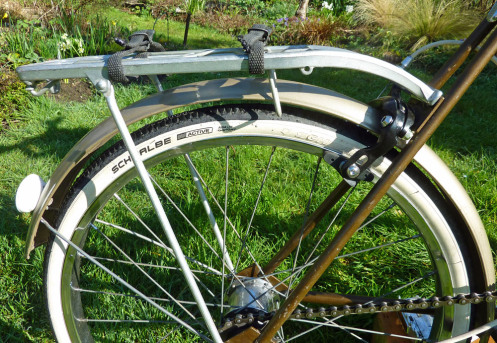
The wheels are in very good condition, the original Sturmey-Archer rims being true and almost perfect cosmetically. The front hub and rear hubs are also fine and the spoke tension is OK. So rather than spend a small fortune on new 451 wheels, I decided to keep the originals and just fit new inner tubes and new Schwalbe Kevlar-protected whitewall tyres. Yes, steel wheels have poorer wet weather braking but I don’t intend riding this bike much in the rain. Also, I upgraded the brakes, about which more below.
This bike did not have a carrier (rack) but I found this original Swiss-made Pletscher on eBay. This model of carrier was original equipment on some Raleigh 20s and fitted perfectly. It has a sprung parcel clip and I have added a couple of old-style toe-clip straps – often handy for securing items of luggage (such as a rolled up jacket).
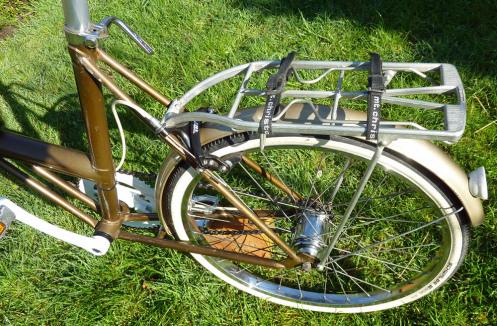
Another view of the carrier.

And yet another shot of the carrier, but this time including the new longer and alloy micro-adjust seat pillar. This replaced the original steel seat post, which, for no good reason, was slightly shorter than the standard Raleigh 20 item, and which had an old-style steel saddle clip. The saddle now fitted is quite a nice one from the spares box. The original, supplied with the bike, was a very cheap vinyl-covered mattress saddle, with no main chassis springs – unlike the relatively plush Brooks item fitted to the FE described in a previous post.
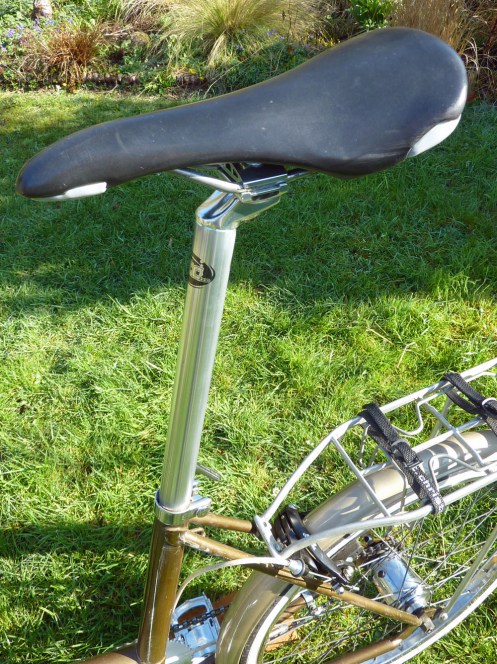
Another view of the saddle and seat pillar. Also in shot is the Sturmey-Archer AW wide-ratio 3-speed hub. As can be seen, this was made in the days when they still fitted a lubrication point, so it’s easy to add a few drops of oil from time to time. The AW is a very efficient hub but the original gearing of Raleigh 20s is on the high side. So, although I kept the same number of teeth on the chainwheel (46), I fitted a larger rear sprocket (17 tooth). This lowers the top gear to 71-inches, a great gear for pootling along at a reasonable speed, without hunting between top and middle gear. Middle gear is now reduced to 54-inch, fine for many moderate slopes. Low gear drops to 40-inch, enabling easier hill climbing. For most people, reducing the gearing in this way is one of the easiest and most worthwhile upgrades you can make to a Raleigh 20 or derivative.
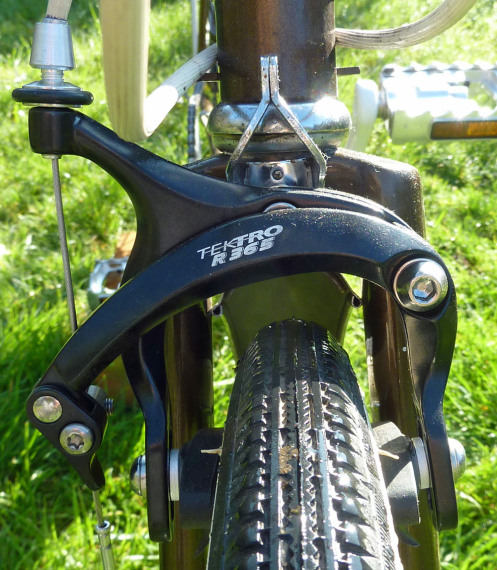
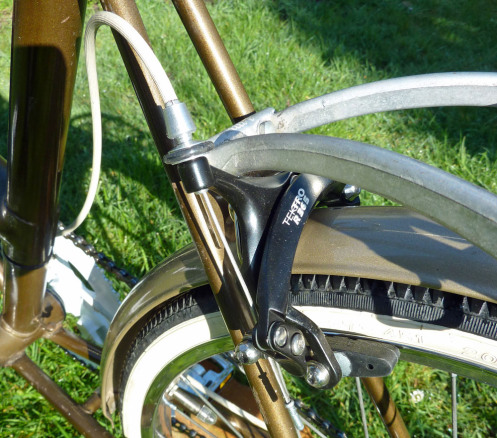
The original pressed steel calipers are not great (poor leverage and flexible arms), so I replaced them with these Tektro R365 dual-pivot brakes. The leverage at the caliper is much better (aided also by better brake lever leverage), they are quick-release and incorporate adjusters for brake block clearance and cable tension. As the brake fixing bolt that passes through the fork crown is retained by a threaded sleeve (rather than a standard nut) it is necessary to enlarge the hole through back of the crown slightly. Also, these calipers fouled the forward extension of the original mudguard. This was easily resolved by trimming back the mudguard. Visible in this picture, against the lower steering bearing, is the chrome-plated stop that prevents the forks being reversed. I took the opportunity of fitting new balls to the lower steering bearing. (The upper bearing is solid nylon, which damps the otherwise rather light steering. It can be replaced with a ball bearing unit, if desired.)
Despite the long reach of these brakes, the fixing hole for the rear brake caliper needed to be elongated downwards by a few millimetres to get the brake blocks low enough to avoid the risk of them rubbing on the tyre sidewall during braking. Slightly longer brake arms would avoid this problem.